৩১ মে, ২০১৩

How to create hidden user account in Windows XP, Windows 7.

How to create hidden user account in Windows XP, Windows 7.

All windows operating system versions like windows xp, windows vista windows 7 provide a feature to create multiple user accounts. You can provides each user accounts some specific permissions. If there are more than one user accounts on a computer. They will be displayed on welcome screen. You can login to specific user account. In fact while displaying all user accounts on welcome screen has always some security risks. Somebody can hack your computer by just guessing your password as username is already displayed here. To make security more stronger on your computer, your can hide a user account from the welcome screen in windows xp, windows vista and windows 7 by simple hack as explained in following steps: -
windows-user-accounts
  • Go to Start >> Run or Press Windows key+R.
  • Type regedit in Run dialogue box opened.
  • If it prompts for your permission to edit registry, just press Yes.
  • After registry editor opens, just follow the path as given HKEY_LOCAL_MACHINE >> Software >> Microsoft >> Windows NT >> CurrentVersion >> Winlogon >> SpecialAccounts >> UserList
  • If you can’t see SpecialAccount under Winlogon, just right-click on Windlogon >> New >> Key. Name this key as SpecialAccounts.
  • Now right click on SpecialAccounts >> New >> Key. Name this key as UserList ( Case sensitive)
  • If SpecialAccounts and UserList are already present under Winlogon, You need not to perform above two steps. Just continue from below step.
  • Now right click on UserList >> New >> DWORD(32-bit) Value
new-dword-value
  • Just name this value exactly as the user account which you want to hide.
hide-user-account
  • Restart your computer. You will not see that specific user account on welcome screen on starting windows this time.
  • For logging in to hidden account in windows xp, First option is to go to reboot windows in safe mode. In safe mode all the user accounts will be shown. And you can log in to hidden account. Besides you can type manually username and password on welcome screen to log in hidden account.
  • Secondly you can press CTRL+ALT+DEL ( two times)
  • But to log in hidden user account in windows 7, you can read our detailed article How-To enable user account login with username and password in Windows 7.  After making some changes as explained in this article. You will be able to log in by typing username and password in welcome screen just as in windows xp.
Now again to show this hidden user account, just delete above DWORD(32-bit) value created. That user account will be again shown on welcome screen.
So you can hide any user account in windows xp, windows vista and windows 7 to make your computer security more better.

Source: Hacker Is Better
Spread Your Knowledge

২৭ মে, ২০১৩

Gmail Notifier Pro 5.0 Free Download


thumb-BE45_50ABA3CC

     Gmail-Notifier-Pro


Gmail Notifier Pro  could be a Windows application capable of checking multiple Gmail accounts for brand spanking new mail and show notifications.

                            Gmail Notifier Pro

Feature highlights
– Check multiple Gmail accounts, as well as Google Apps, for brand spanking new mail.
– Supports each Atom and IMAP protocols for mail.
– Supports customizable themes and individual account settings, creating Gmail Notifier professional the simplest trying Gmail notifier on the web!
– Read, write, reply, preview and save attachments, mark as scan and delete mail while not the online browser. Supports Google Contacts.
– Integration with Google Calendar accounts provides reminders for calendar events.
– Get news notifications from Google News & Google Reader.
– Supports RSS/Atom feeds to urge notifications from any news supply.
– Gmail Notifier professional provides several easy-to-use options and settings.
– outline schedules once to ascertain for mail and show notifications.
– additionally to the installation package, Gmail Notifier professional also can run from a USB-stick with none installation.
– Gmail Notifier professional supports automatic updates. a replacement version will be downloaded and put in with one click.
– Secure account management and encrypted connections (HTTPS / SSL) area unit used. 100% FREE from virus, spyware and adware.
– Gmail Notifier professional is just the simplest Gmail notifier for Windows.
– Supports 32-bit & 64-bit Windows XP, Windows prospect & Windows seven.


File Size: 7 mb
Download Link
Click Here  
Source: Hacker Is Better
Spread Your Knowledge
©Hacker Is Beter

২১ মে, ২০১৩

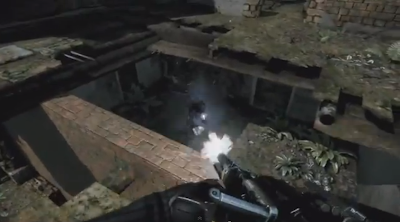
Crysis 3 INTERNAL+CrackFix RELOADED For PC Games

Crysis 3 INTERNAL+CrackFix RELOADED For PC Games


Crysis 3 INTERNAL+CrackFix RELOADED For PC Games
Game Title        : Crysis 3
Game Alias: Crysis III
Genre : First-person shooter
Platform : PC
Relase: 02/19/2013
Language : English
Copyright : EA Games
Size: 14.52 GB
On the opportunity this time I will share the game titled Crysis 3 INTERNAL RELOADED, a spectacular game with graphics so real display make this game including a favorite game played throughout the world. There are many weapons that you can use such a weapon arrows, you can also take your opponents weapons if you can defeat your enemy and seize their weapons.

System Requirements For Games Crysis 3 INTERNAL RELOADED
  1. CPU: Intel Core i3-530 / AMD Phenom II X2 565
  2. RAM: 4GB Memory
  3. VGA: DirectX 11 graphics card with 1GB Video RAM Nvidia GTX 560 / AMD Radeon HD5870
  4. DX: DirectX 11
  5. OS: Windows Vista, Windows 7 or Windows 8
  6. Note: HI-PERFORMANCE PC SPECIFICATIONS: • Windows Vista, Windows 7 or Windows 8 • Latest DirectX 11 graphics card • Latest quad core CPU • 8GB Memory • Example 1 (Nvidia/Intel): • NVidia GTX 680 • Intel Core i7-2600k • Example 2 (AMD): • AMD Radeon HD7970 • AMD Bulldozer FX4150

Crysis 3 INTERNAL+CrackFix RELOADED For PC Games

Crysis 3 INTERNAL+CrackFix RELOADED For PC Games

Crysis 3 INTERNAL+CrackFix RELOADED For PC Games

Crysis 3 INTERNAL+CrackFix RELOADED For PC Games

Crysis 3 INTERNAL+CrackFix RELOADED For PC Games

Crysis 3 INTERNAL+CrackFix RELOADED For PC Games

Crysis 3 INTERNAL+CrackFix RELOADED For PC Games

Crysis 3 INTERNAL+CrackFix RELOADED For PC Games

Crysis 3 INTERNAL+CrackFix RELOADED For PC Games

Crysis 3 INTERNAL+CrackFix RELOADED For PC Games 
 
Download Torrent
Click Here...  

Source: Hacker Is Better
Spread Your Knowledge
©Hacker Is Better

১৫ মে, ২০১৩

Top 3 tools to access the blocked sites

Top 3 tools to access the blocked sites


Many of us are facing the problem of blocked websites and don't know how to
access the blocked sites, but there are various software's/VPN's that can
be used to access the blocked sites. So this post will give you complete
guidance about how to access the Blocked sites using the Software's,Proxies,
VPN's etc.

Below is the list of tools that can be used to access the blocked websites:

1> Proxy Websites:

Hidemyass.com
Free Web Proxy
Proxy sites list
Gold proxy list
Proxy list forall
All proxy sites
Proxy.org

Note: In order to use the proxy in web browser see how to manually configure
Proxy address and port to use free Internet on PC

2> Proxy Tool for Desktop:
There are many proxy tools that can be used on the system desktop to
access the sites that are blocked by your office/school/university etc..
but the speed of these proxy tools is little less as compared to IP Proxies
and VPN's.

List of some are:

Ultrasurf
Tor
Your Freedom
Freegate
Gpass
HTTP-Tunnel

3> VPN's:

VPN(Virtual Private Network) is the network that works fine in any type
of configuration provided; also the speed of VPN is quite good. These are
list of VPN's that work fine with your system.

Hotspt Sheild
Securitykiss
ProXPN
Private Tunnel


These are some of the few Software and IP Proxies tricks which will
definitely help you to access the blocked site.

Source: Hacker Is Better

৯ মে, ২০১৩

How To Make Windows 8 Go Faster

How To Make Windows 8 Go Faster

5 votes, 5.00 avg. rating (99% score)
Whatever you think of Windows 8, it’s certainly speedy. Windows 8 boots faster than previous versions of Windows, has lower memory usage, and has a desktop that feels nice and snappy. Like all versions of Windows, Windows 8 has a variety of settings you can tweak to speed things up and make it even faster.
Some of the tips here also apply to previous versions of Windows, but Windows 8 has some new tricks up its sleeve. As always, there are trade-offs when using some of the below tricks – there’s no magic “Go Faster” button.

Disable Time-Wasting Animations

Windows 8 (and Windows 7) display animations when you minimize, maximize, open, or close application windows. The animations are slick eye-candy, but they do introduce a delay. You can disable the animations and window transitions will happen instantly, eliminating the delay.
To disable the animations, press the Windows key, type SystemPerformanceProperties, and press Enter. Uncheck the Animate windows when minimizing and maximizing option. You may also want to disable some of the other animations, such as the Fade or slide menus into viewand Fade or slide ToolTips into view. This will make menus and tooltips snap to attention instead of fading in with an animation.

make windows 8 faster

Pinpoint Apps Using Lots of Resources

Windows 8’s new task manager allows you to easily pinpoint the programs slowing down your computer. To open the Task Manager, right-click the desktop taskbar and select Task Manager.  Click the More details option if you don’t see the full interface.
Applications using a lot of resources will be highlighted, making it easy to see which programs are using up your computer’s resources. This list also shows a simplified list of applications, which is easier to understand and skim than the old-style processes list (if you prefer the old-style process list, it’s still available on the Details tab).

make windows 8 fast

Manage Your Startup Programs

The Windows Task Manager now allows you to easily disable programs that start with your computer. Click the Startup tab in the Task Manager to access these options.
Windows also analyzes how long each program takes to start and displays this information in the Startup impact column. Select a program and click Disable to prevent it from starting with Windows, speeding up your startup process.

make windows 8 fast

Use Included Security Programs

Instead of installing third-party security suites that often slow down your computer, try using the included security applications. Windows now includes an antivirus – while it’s named Windows Defender, it’s basically the same as the popular Microsoft Security Essentialsapplication.
make windows 8 fast
Windows 8 also includes a SmartScreen feature, which analyzes how trustworthy programs you download are. As in previous versions of Windows, Windows also includes a firewall that blocks incoming connections. If you want more settings and options, you may want to install a third-party security suite – but most users will find that Windows 8’s included security programs are finally complete enough to rely on.

Modify Power Settings

Windows 8 uses power plans to determine whether battery life or performance should be prioritized, just as previous versions of Windows do. To view your power plan settings, press the Windows key, type Power Plan, click Settings, and press Enter.
In the default Balanced mode, Windows automatically reduces your CPU’s speed when maximize speed isn’t needed. This saves power. To squeeze all the performance you can out of your hardware, you may want to try High performance instead. In High performance mode, your CPU’s speed is never reduced. It runs at full speed all the time.
However, this isn’t necessarily a good thing. Even high-performance gaming PCs are used for web browsing some of the time and it doesn’t make sense to run the CPU at full throttle while browsing the web. This just wastes power and generates additional heat.
Whichever plan you choose, make sure you aren’t using Power saver. This is only useful if you want to squeeze as much battery life out of your laptop as possible.

make windows 8 run faster

Put Your Computer To Sleep

One of Windows 8’s most controversial aspects is the way it buries the Shut Down option in a hidden menu. Microsoft wants to encourage you to use Sleep mode instead of shutting down your computer. When you use Sleep, your computer goes into a very low-power state that uses just enough power to keep your programs and open files active in your computer’s RAM. When you come back to your computer, it will resume from sleep almost immediately. Using Sleep instead of Shut Down can dramatically speed things up when you sit down at your computer.
You’ll find a Sleep option under the power button in the Settings charm. (Press Windows Key+C, click Settings, click Power, and select Sleep). Your computer’s power button may also be configured to use Sleep automatically. You can change this option by clicking the Choose what the power buttons do option in the Power Options window mentioned above.

make windows 8 run faster

Optimize Your Hard Drives

Windows 8 includes the standard Disk Defragmenter, now named the Optimize Drives tool. To access it, press the Windows key, type Defragment, click Settings, and press Enter. Note that Windows 8 automatically optimizes (defragments) your drive once per week by default. However, if you move a lot of files around, you may want to optimize your drives sooner.
As on previous versions of Windows, click the Analyze button to see exactly how fragmented your file systems are.
make windows 8 run faster

Control Windows Indexing

The Windows indexing service automatically scans the files on your computer and monitors them for changes, allowing you to quickly search for files without waiting. Indexing uses some CPU time (and uses more CPU time if you frequently change a lot of files) so disabling it can help you reduce CPU usage.
Bear in mind that indexing speeds up searches. If you regularly use the Files search feature on the Start screen or the search feature inside Windows Explorer, you won’t want to disable indexing. You should only disable indexing if you don’t use the search feature.
To disable Windows Search, press Start, type services.msc, and press Enter. Scroll down in the list, locate the Windows Search service, right-click it and select Properties.
windows-search-service

Set the Startup type box to Disabled, click the Stop button to stop the service, and click OK.

windows-search-service-properties

Instead of disabling the indexing service entirely, you may also want to control which folders Windows Search indexes. By default, it indexes your Users folders. if you have some folders full of files you don’t want to search, especially ones that frequently change, you may want to exclude these folders from being indexed. To control these settings, press the Windows key, type Indexing, click Settings, and press Enter.

make windows 8 faster

©Hacker Is Better